Exporting A SharePoint Site Into A Feature: Part 4 – Exporting Site Columns and Content Types

If nothing else, this blog post will win the award for longest title that I’ve written yet.  Joking aside, It’s time to put one of the finishing stones in place for this series.  So far we’ve exported the site and lists, now it’s time for the site columns and content types.  The tool we’ll be using this go around is the Imtech Fields Explorer.  The process is fairly straight forward so let’s dive in.

Launching the field explorer tool, you’ll first be prompted to specify your SharePoint site URL and click Open.  You’ll see entries for this site’s content types, site columns, and lists.  Strangely (at least in the v1.3.0.0 version I’m using) I am not able to export lists.  Not sure if this is intended functionality or just features yet to be implemented.  Either way, select the content types and site columns to be exported.  You can also view detailed information about the individual entries, similar to other products such as SharePoint Manager.
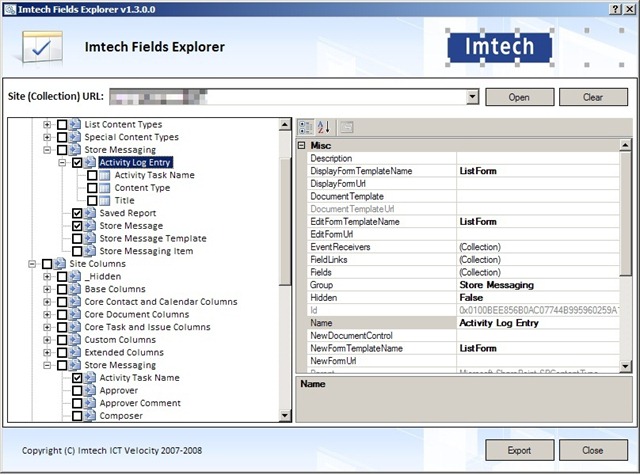
ExportSharePointSite2     Click Export once you’ve selected your items.  If you’ve selected both content types and site columns, the export will occur in two phases starting with content types.

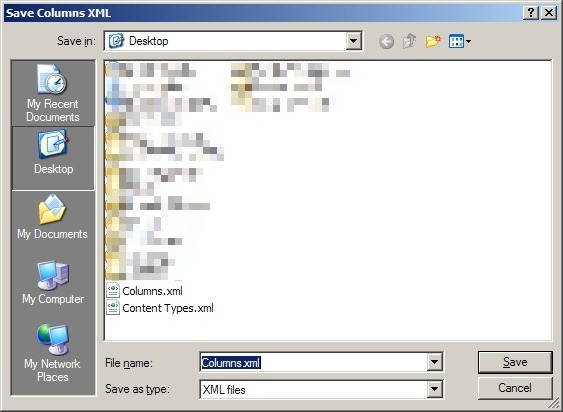
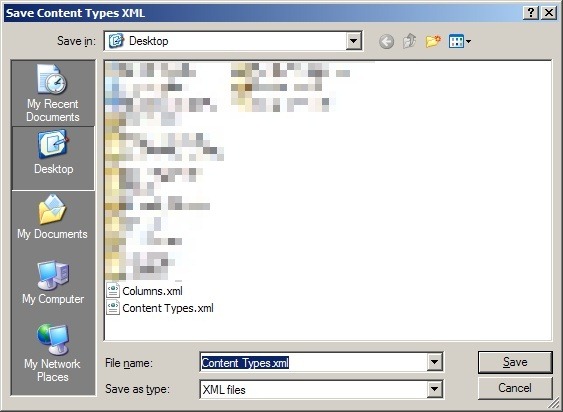
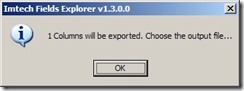
ExportSharePointSite2a     Select the destination file location for the “Content Types.xml” output.  I typically go with the desktop for convenience of loading into Visual Studio (or favorite text editor) when complete.
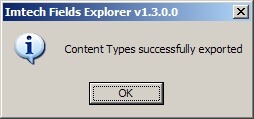
ExportSharePointSite2b     You’ll receive a success screen when that completes.
ExportSharePointSite2c     Follow the same procedure for site columns.
ExportSharePointSite2dExportSharePointSite2eExportSharePointSite2f     Now that you’ve got your output files, open them alongside your WSPBuilder solution.  The Columns.xml file is fairly simplistic.  It will detail all of the properties and metadata used to define a site column.  Copy all of the <Field> elements into the elements.xml file of a feature for deploying your content types (a blank feature in WSPBuilder will suffice.)  I’ve only chosen one column for the example below, but you’ll more than likely have many more.

ExportSharePointSite10a     Next open the Content Types.xml file.  For content types, so far I’ve found only the <Content Type> elements to be necessary while the <XmlDocuments> elements can be left out.  If anyone knows the <XmlDocuments> to be required for some reason let me know.  Copy the <Content Type> elements and their child elements into the same elements.xml file as above.  The <FieldRef> elements will link to the <Field> elements via the GUID.

ExportSharePointSite10b     Now if you remember from the end of part 3 of this series we talked about needing to add in the content type and site column definitions to our list definition’s schema.xml file as well.  So while we’re copying these definitions into the elements.xml file above, also add them to the appropriate schema.xml files for your lists.  Only the content types and site columns belonging to that list definition will need to be copied over.  In the end you’ll have something similar to the below example for the list schema.xml file.

ExportSharePointSite10c

And with that we’ve reached the final step of our exporting process.  I’ll be putting together a wrap up post on some caveats that I’ve run into thus far and other things to look out for along the way.  I’ll also do a quick bit on actually deploying the site template for use.  Thanks for reading along so far.  Post any comments or questions you have.  Until next time.

-Frog Out
Exporting A SharePoint Site Into A Feature: Part 3 – Exporting the Lists

So let’s recap where we’re at with this series.  Part 1 was about the tools I’ve been using to export a SharePoint site to a  feature, part 2 exported the base (pages, web part settings on pages, etc) of the site template, and now part 3 will be exporting SharePoint lists into our feature.  The tool we’ll be using time around is the MOSS Feature Generator (previously called CT Feature Creator among other names.)

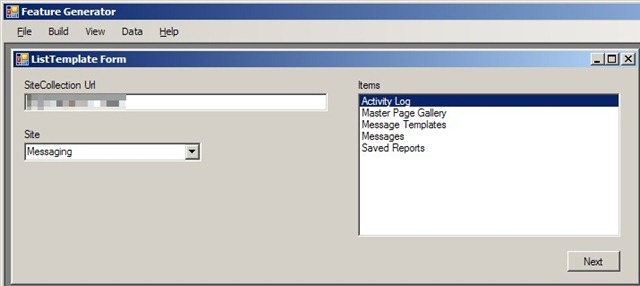
As I stated in part 2, I prefer the output from the MOSS Feature Generator to that of the SharePoint Solution Generator 2008 because it required less modifications to fit into my WSPBuilder solution.  When you launch the tool, click File > New > ListTemplate Feature.  Next specify your site collection Url, the individual site that contains the lists to be exported, and the list itself.

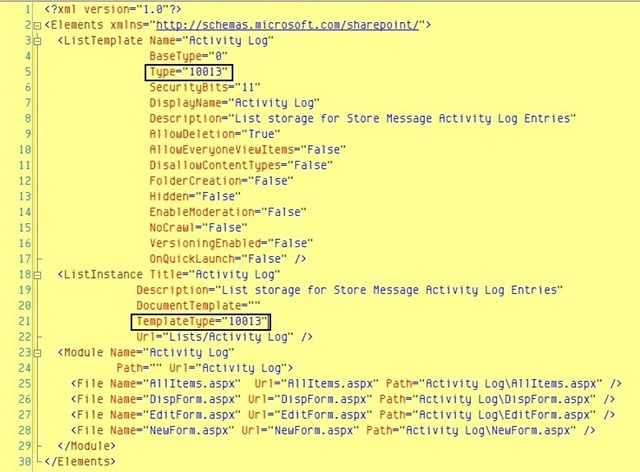
ExportSharePointSite11a     The next screen contains a whole host of boxes, but we’ll only touch on a few of the more important ones.  Obviously you’ll want to specify a Name and Description for starters.  Next take a look at the Type (first red box below) box.  The value will typically be the base list template id that your list is already inheriting from.  Read this post for a little explanation on each template id.  As you’ll see, 100 is the generic list template id.  Since we’re trying to create a new list template, you’ll want to create a unique id.  I typically choose values above 10000 since the out of the box list template id’s don’t currently go that high.  Feel free to come up with your own system.

The other box I’ll highlight is DisallowContentTypes.  If you’re using content types on your list (and I recommend doing so for organization and consistency sake,) then you’ll want to pay attention to this later on.  I haven’t found a way to set this during the export process, so we’ll take care of that after placing it into our feature later on. ExportSharePointSite11b

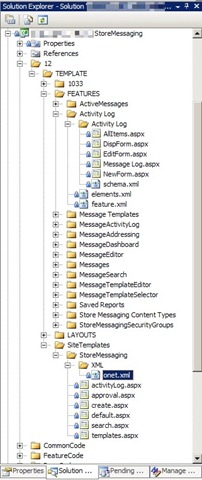
Referring to our picture from part 2 on the solution layout, you’ll want to take your output files and place them into your solution as seen below.

ExportSharePointSite8c    Next, open the elements.xml file.  First thing to notice is that I have added some additional markup that you won’t find in the output from our list template creator.  I’ve added <ListInstance> and <Module> nodes so that my list template is instantiated within my feature.  Feel free to model your file similarly, but not necessary.  Lastly, make sure the Type (and TemplateType if you add the list instance) value is a unique value.

ExportSharePointSite11c

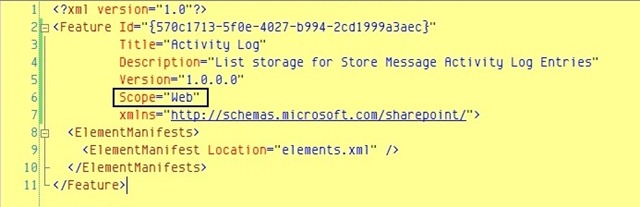
Next, open your feature.xml file.  The only modification I have done here is make the feature scoped to the web since a list lives on an individual site (web) instead of at the site collection (site) level.

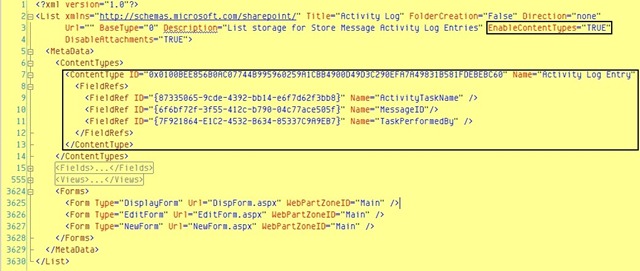
ExportSharePointSite11d     The last (and probably most important) file is the schema.xml one which defines the infrastructure of our list.  As you’ll see below, I’ve outlined the addition of two key pieces.  First is the EnableContentTypes attribute of the <List> element which has been set to True so that we can have custom content types.  The second highlighted piece is the definition code for our custom content type.  Don’t worry if you don’t have (or know how to get) that XML snippet.  I’ll be covering that in part 4 of this series.  For now though, you have a rough sketch of your list template.

ExportSharePointSite11e     As a quick aside, I’ve noticed one thing by working with the schema.xml (and onet.xml from the site template in part 1) file very frequently.  When I need to make a change to these files (add a fieldref, change view query, etc) I’ve become faster and more efficient at editing the raw file versus updating through the UI and exporting a new copy.  Reminds me of my time working with Unix and VI at a previous job.

So there we have it, second piece of our site template exported into our feature.  Part 4 will be focusing on exporting site columns and content types.  In the past that used to be a very complex and hard to manage portion of the process, but with new tools that is not the case anymore.  Stayed tuned for that installment and in the meantime post and comments or questions you may have.  Thanks for tuning in.

-Frog Out

Exporting A SharePoint Site Into A Feature: Part 2 – Exporting the Site

Took a little longer to get to part 2 than expected with being gone last week on vacation and client work this week.  Quick recap for everyone on what we’re trying to do here.  Scenario would be that you’ve already built and customized a SharePoint site using the web UI (edit page, add web part, create list, create site columns, etc.)  Now we want to be able to capture that site and put it into a SharePoint feature (and solution) so that we can easily re-deploy it say for disaster recovery, migrating between development environments, or any number of other needs.

For a reference on any of the tools to be used, please read part 1.  The first thing you’ll want to do is create a WSPBuilder solution, preferably placing it under source control.  My coworker Kelly Jones and I tossed around the idea of writing up a guide for how to create the infrastructure for setting up SharePoint development environment, perhaps someday you’ll see a post on that.  For now though, check out this introduction to WSPBuilder or drop me a line if you need help getting started with WSPBuilder.  Most of my experience with it has been hands on so I don’t have too many references for getting started with it.

Once you have your WSPBuilder solution created, we’ll use the SharePoint Solution Generator 2008.  This tool will export our site into a Visual Studio solution to give us a starter base.  Run the tool (on a SharePoint server in the farm, very important) and select Site Definition.

ExportSharePointSite3

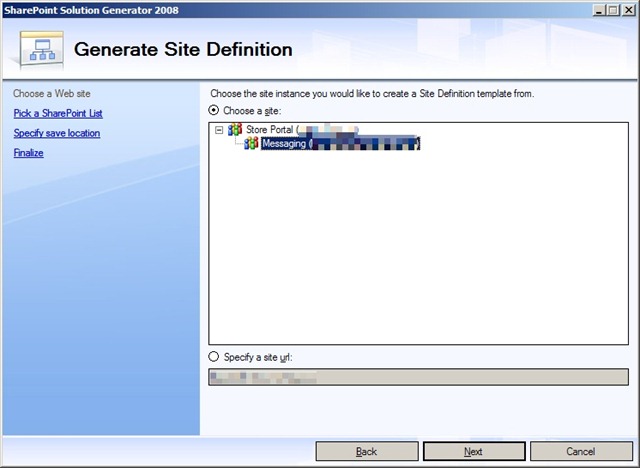
Next Select the site to be exported.  In my case I wish to export the Messaging Site which is a subsite of Store Portal.

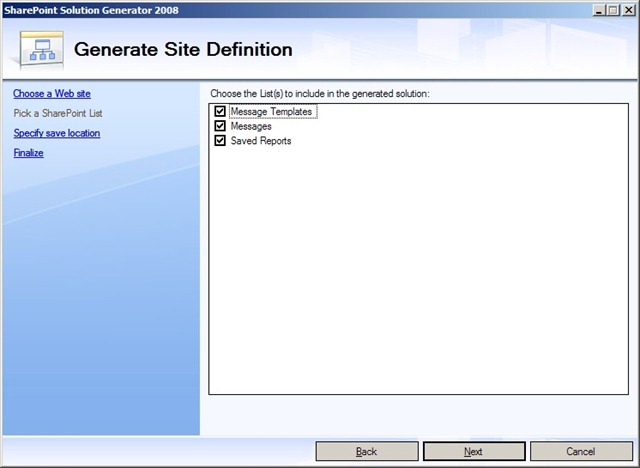
ExportSharePointSite4     Once you have selected the site, you may choose to export lists contained on that site.  I have chosen to export all of my lists but that is not necessary.

ExportSharePointSite5

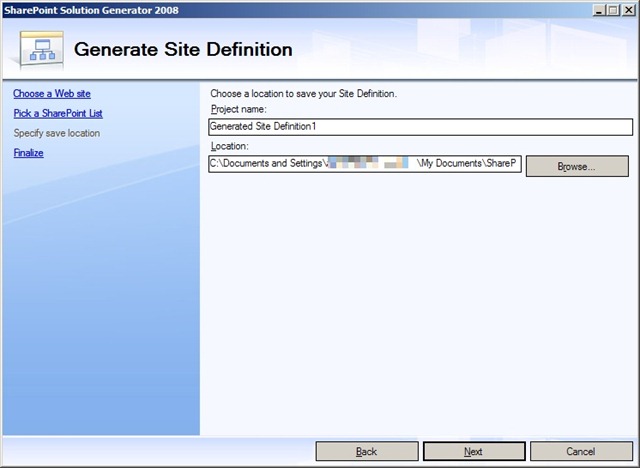
Last, select the location to output the generated solution file to and give it a name.  I leave the defaults.

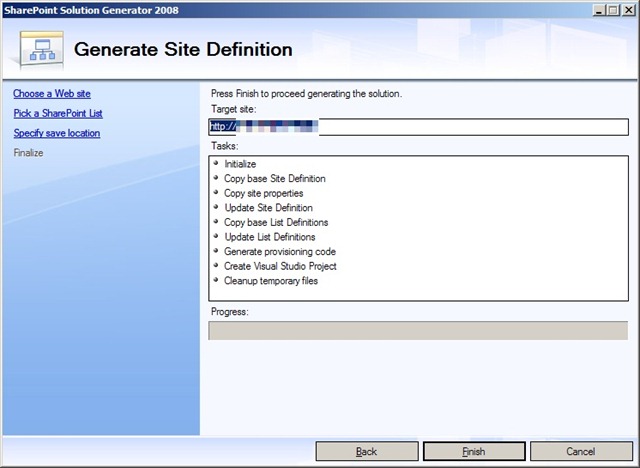
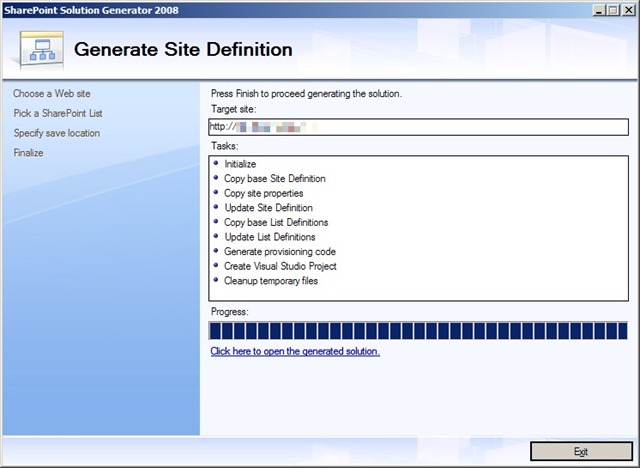
ExportSharePointSite6     The solution generator will show you a progress bar and indicate any errors that may come up during the export process.  I have yet to run into any errors in all my times using the tool.

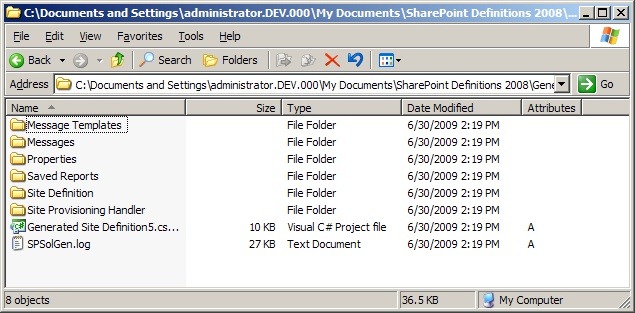
ExportSharePointSite7     Once the export has completed click on the link to open the folder containing the solution that was generated.

ExportSharePointSite8

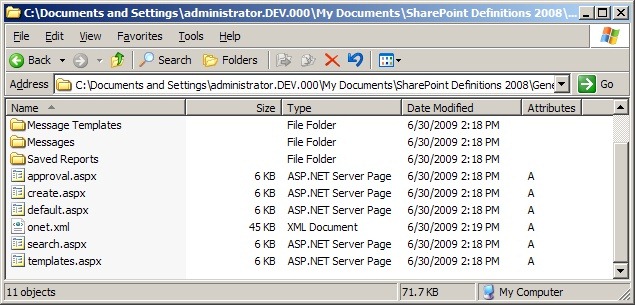
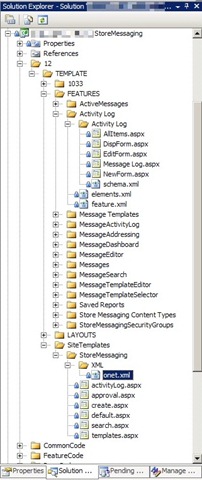
Taking a look at the solution file, we’ll see a couple of things.  First is the site template folder.  This contains all of the .aspx pages, the onet.xml (more on that in a later part of the series), and instances files for the lists exported.  Note: files below were from a previous export, so you won’t see some of the same folders for lists.

ExportSharePointSite8aExportSharePointSite8b      You’ll want to place these files into your solution file similar to how I’ve done below.  While you can copy in the list folders into your features folder, I’ve found that the MOSS Feature Generator does a better job encapsulating all of the required information in a much smoother fashion.  So for now hold off on copying those list folders unless you’d like to toy around with how they work.  You’ll want to rename some files (ListDefinition.xml becomes elements.xml, etc) and modify some values to be more in line with the defaults used by WSPBuilder.


ExportSharePointSite8c

There you have it, you’ve exported your site into a WSP Solution and with minimal effort.  In part 3 I’ll dive into the MOSS Feature Generator and show you how to export your lists directly into feature folders.  Part 4 will be the Imtech Fields Explorer and how to export site columns and content types.  I’ve not yet planned out if there will be any further parts to this series beyond the four, but I imagine there will be at least a post or two more about advanced items.  As always I appreciate any feedback, suggestions, questions, or comments from my readers.  Let me know if there’s anything I can help with.  Until next time.

-Frog Out
Exporting A SharePoint Site Into A Feature: Part 1 – The Tools

  • Part 1 – The Tools
  • Part 2  – Exporting the Site
  • Part 3 – Exporting the Lists
  • Part 4 – Exporting the Site Columns and Content Types
  • Part 5 – Wrap Up    <Update>Please read the intro paragraph of part 5 for a correction relating to the title of this series.  It should more appropriately be called something along the lines of “Exporting A SharePoint Site Definition and Features” but I’ll keep the original titling for now</Update>As I promised a blog post or two ago, I’ve been wanting to write up how to export a SharePoint site into a site template defined as a feature, so here is part 1 of the multi-part series.. Not only is exporting a SharePoint site into a feature good for repeatability (disaster recovery anyone), but I’ve actually used it in my last two clients when migrating a site (and subsequent upgrades) through various development environments.  First and foremost I have to thank my good friend and coworker Kelly Jones for his help in guiding me down a path of standards and best practices in this area of SharePoint.  He introduced me to a couple of tools and blog posts that really helped.

    As noted in a previous post I enjoy checking out new technologies that help me do my job (or hobbies) more easily and efficiently.  For this given topic I use a mix of tools that each have a set of advantages in certain areas.  So what better way to get started then introduce you to a few of the tools that I’ve been using to get going on exporting a SharePoint site into a feature.

    1. WSPBuilder – This tool is a great choice for creating a SharePoint solution in Visual Studio that contains projects for SharePoint features, site templates, web parts, and many other entities.  Note that the VB.net support was just recently added 2 builds ago and last I checked needed a little work still.  Aside from that this tool let’s you do 1-click each for builds of your WSPs, deploy WSPs to farm, deploy files to 12 Hive, recycle app pools, attach to W3WP.exe process, and many other commonly needed functions.  I also like the fact that the tool developer releases updated builds fairly regularly.
    2. SharePoint Solution Generator 2008 (included in the Visual Studio extensions for WSS 1.2 download) – Once you have a rough layout of how you would like your SharePoint site to look (pages, lists/libraries, web parts, etc) you’ll want to use this tool to create a starter site template.  The output solution will contain a site template as well as list templates for any lists you chose to export.  I will go into detail on how to integrate this output into your SharePoint solution in part 2.
    3. MOSS Feature Generator (previously called CT Feature Creator among other names) – A beauty in its own right, this tool let’s you export some of the pieces not captured by the site template such as site column and content type.  I typically use this to capture the basis for a content type then fill in the remaining pieces with the next tool below.
    4. Imtech Fields Explorer (part of the Imtech ICT Velocity CodePlex project) – Honestly I am surprised that I don’t hear more buzz about this tool more often.  Some initial suggestions for exporting site columns or content types come from Gary LaPointe’s blog post and another from Andrew Connell’s blog post.  This tool fits nicely into a process for me.  As such this is one of those diamond in the rough type of finds.  As noted above, I use this tool to fill in the gaps of the MOSS Feature Generator which only lets you export one site column or content type at a time.  The Imtech Fields Explorer on the other hand lets you export multiple site columns or content types at a time (but not both at the same time).  With this tool you can integrate your output into a SharePoint feature (using the MOSS Feature Generator above) to deploy all of your site columns and content types to a site collection.  When you are exporting half a dozen site content types with 40+ site columns this will save you lots of time.

    So now you have a list of some tools to check out (or become more familiar with if you’re already using them.)  The next part in the series will be focused on taking a site that you have already modified a bit and exporting it into a basis site template.  Depending on how much ground I cover this may turn into a 3 or 4 part series.  Until then, shoot me any feedback if you have problems getting these tools up and running or suggestions for other tools you’re using to export site templates into a feature.  Enjoy and have a safe and fun July 4th.

    – Frog Out

Implementing the AJAXControlToolkit AutoCompleteExtender inside SharePoint

<Foreword>For those looking for help integrating the AJAXControlToolkit with SharePoint check out this post: Integrating ASP.NET AJAX with SharePoint</Foreword>

I’ve never been one to use JavaScript that much in my web development, partially because I haven’t had much training with it and partially because I usually work on heavy server side web applications.  My current work project was well suited for some of the AJAXControlToolkit controls so I’ve been trying out other controls in the toolkit to see what uses they may have.  Last week I ran into a difficult client request that I didn’t have an efficient solution for in my first few passes.  Here’s the back story.

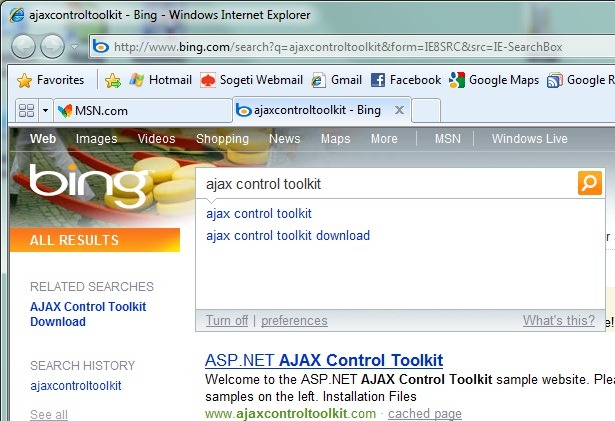
The client has 500+ stores that they operate and part of the web application I’m designing sends messages between those stores.  The user will select various criteria for which stores are included: zone, district, state, etc.  One of the selections happens to be a custom store group code.  The number of store group codes currently used is well above 8000.  Obviously making the end user scroll through a list of 8000+ options is not ideal.  After attempting to implement a quick proof of concept of how bad performance was the web page chugged after every action.  The page size alone was over 1 MB and response time was going on 15-30 seconds or more.  What I wanted to present was something akin to a search engine (http://www.bing.com as an example) suggestion box that gives the user suggestions as they type.

AutoCompleteExtender3

With this type of solution I could have the user filter the available options to less than 600 with just 1 letter entered and less than 50 with 2 letters entered.  Not only would this be more manageable to search through, but it would also save posting all of that extraneous data into the web page file thereby reducing the page size considerably.  Eventually I ran across the AutoCompleteExtender from the AJAXControlToolkit.  The way this control extender works is that you wire up a target control (textbox) and a web service that you will call into to get your results.  Below is part of the code needed to get this working.  I included a TextBoxWatermarkExtender as well to give a hint to the user.

TextBox txt = new TextBox();

txt.ID = "txtStoreGroupList";

txt.Width = Unit.Percentage(100);

table.Rows[rowNum].Cells[3].Controls.Add(txt);


table.Rows[rowNum].Cells[3].Controls.Add(new LiteralControl("Type at least 2 characters of store group code"));


// watermark extender gives directions on adding store groups

AjaxControlToolkit.TextBoxWatermarkExtender twe = new AjaxControlToolkit.TextBoxWatermarkExtender();

twe.ID = "tweStoreGroupList";

twe.TargetControlID = "txtStoreGroupList";

twe.WatermarkText = "Begin typing store group code...";

table.Rows[rowNum].Cells[3].Controls.Add(twe);


// autocomplete extender enables lookup of store groups without loading all 8000+ onto page

AjaxControlToolkit.AutoCompleteExtender ace = new AjaxControlToolkit.AutoCompleteExtender();

ace.ID = "aceStoreGroupList";

ace.ServiceMethod = "GetStoreGroupCompletionList";

ace.ServicePath = "/_layouts/autocompleteservice.asmx";

ace.TargetControlID = "txtStoreGroupList";

ace.MinimumPrefixLength = 2;

ace.CompletionSetCount = 50;

ace.CompletionInterval = 300;

ace.EnableCaching = true;

table.Rows[rowNum].Cells[3].Controls.Add(ace);

Looking at the implementation of the AutoCompleteExtender I require a “MinimumPrefixLength” of 2 and a “CompletionSetCount” of 50 so that the result set is manageable.  I have created a Web Service “autocompleteservice.asmx” with a web method “GetStoreGroupCompletionList” to return my suggestion short list.  This required a little bit of trickery to get working, so note the web service and web method decoration attributes.

[WebService(Namespace = "Your namespace goes here")]

[WebServiceBinding(ConformsTo = WsiProfiles.BasicProfile1_1)]

[System.Web.Script.Services.ScriptService]

public class AutoCompleteService : System.Web.Services.WebService

{

    static string _connectionstring = null;

    static DataTable dt = null;


    public AutoCompleteService()

    {


    }


    [System.Web.Services.WebMethod]

    [System.Web.Script.Services.ScriptMethod]

    public string[] GetStoreGroupCompletionList(string prefixText, int count)

    {

        List<string> results = new List<string>();


        // if datatable for store group data is empty, skip this step

        if (dt == null )

        {

            // CALL INTO DATABASE FOR RESULTS REMOVED


        }


        DataRow[] rows = dt.Select("Group_Code LIKE '" + prefixText + "%'");


        for (int i = 0; i < rows.Length  && i < count; i++)

        {

            results.Add(rows[i]["FormattedDescription"].ToString());

        }


        return results.ToArray();

    }

}

Be sure to include the “[System.Web.Script.Services.ScriptService]” attribute for the web service and the “[System.Web.Script.Services.ScriptMethod]” on the web method as they are not typical inclusions (thanks to this post for leading me in the right direction).  Essentially what they do is allow for the AJAX (any JavaScript really) to call this web service and web method.  Without them you will get something like a giant list of “undefined” values returned.  Now we simply need to publish this web service to a location that SharePoint can reach.  I chose the “/_layouts/” folder for convenience sake.  You could easily publish it to a different location or server that you have access to if needed.

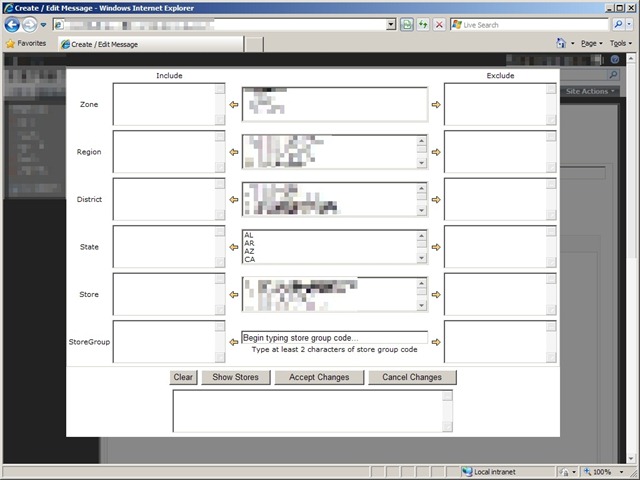
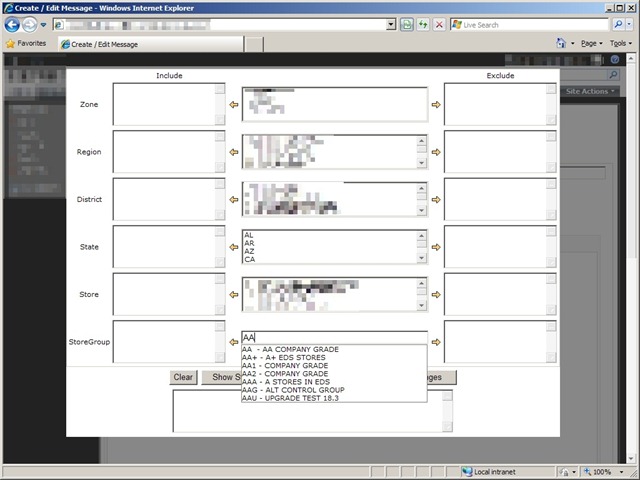
What we end up with is a very nice and easy to use textbox with suggestions that improves performance, improves the user experience, and required minimal coding to complete.

AutoCompleteExtender1

AutoCompleteExtender2

As always please leave any feedback if you liked/disliked this example, have suggestions, etc.  Feel free to “borrow” my code snippets but please include references to the source material here if you do.

-Frog Out

“Cannot import this Web Part” Error with SharePoint Site Template

Generic error messages… SharePoint can sometimes be full of them.  This morning I ran into the “Web Part Error:: Cannot import this Web Part” error (below) that I’ve seen many times before, but none of the usual fixes corrected it.

AddWebPartError1a

The background story is that I’m developing a number of site templates that are pre-populated with security groups, lists, content types, and web parts for easy deployment of a custom application hosted on a SharePoint site.  [As an aside, in the next week or so I’ll be posting about how to get started on setting up site templates and what tools you can use to make your life much easier].

Up until this morning there were never any problems deploying the web part in question.  This morning we did a new push of our build to the test environment.  Most times we completely wipe out the site collection and start from scratch (to catch errors just like this).  As it turns out, this web part was only throwing an error if it was added at site creation/provisioning time.  If you deleted and re-added the web part it would function as normal.

Doing some compares on the source code for the web part showed that I had recently added some security checks to ensure the user accessing the page had proper permissions (i.e. Site Readers couldn’t use an edit textbox in the web part).  As I was performing this check numerous times, I decided to run the check once and store the outcome in a variable.  Unfortunately I placed that security check in the Web Part constructor code (see below).

public MessageEditor()
{
this.ExportMode = WebPartExportMode.All;// my security check was here
}

After a little sleuthing I moved the security check code out of the constructor and into my CreateChildControls() method.

        protected override void CreateChildControls()
{
if (!_error)
{
try
{
base.CreateChildControls();// new location of security check// add controls to the web part
this.Controls.Add(TableControl());
}
catch (Exception ex)
{
HandleException(ex);
}
}
}


Making that little adjustment allowed the web part to be added without an error.  Apparently during site creation, the account that was instantiating the site (SharePoint System or perhaps the Application Pool ID?) was throwing an exception when hitting the security check code in the constructor.

AddWebPartError2

So lessons learned for the day:

  1. Do complete site rebuilds often to catch very rare bugs such as this
  2. Be aware of where you place your custom code
  3. SharePoint errors (can) lead to learning the intricacies of how it works as a web application

As I said, starting to prepare some material for a future blog post on how to export site data such as content types, site definitions, etc.  Until then, leave feedback if you found this article helpful and remember to share your knowledge with others.

– Frog Out